Hướng dẫn khắc phục lỗ hổng bảo mật CVE-2019-11477 trên Cloud365
Hướng dẫn khắc phục lỗ hổng bảo mật CVE-2019-11477 trên Cloud365
Nơi chứa các tài liệu tham khảo của dịch vụ Cloud365.
NGINX là một web server mạnh mẽ và sử dụng kiến trúc đơn luồng, hướng sự kiện vì thế nó hiệu quả hơn Apache server nếu được cấu hình chính xác. Nó cũng có thể làm những thứ quan trọng khác, chẳng hạn như load balancing, HTTP caching, hay sử dụng như một reverse proxy
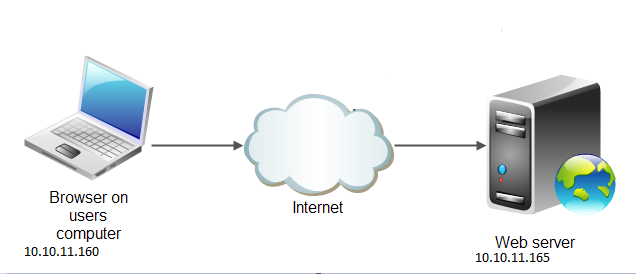
Webserver: Chuẩn bị một máy chủ cài đặt OS Centos 7.6.1810 có địa chỉ IP public 10.10.11.165 Máy Client: Chuẩn bị một máy client cài đặt OS Win 10 để kiểm tra truy cập website với IP client 10.10.11.160

Tắt selinux
sed -i 's/SELINUX=enforcing/SELINUX=disabled/g' /etc/sysconfig/selinux
sed -i 's/SELINUX=enforcing/SELINUX=disabled/g'  /etc/selinux/config
Tắt firewall trên server
systemctl disable firewalld
systemctl stop firewalld
Update OS cho webserver dùng lệnh
yum update -y
init 6
Khi server online truy cập lại ssh vào server với quyền root và tiến hành cài đặt
Để cài đặt nginx chúng ta lựa chọn một trong hai cách bên dưới
Cài đặt nginx theo lệnh yum tại đây
Cài đặt nginx theo Source tại đây
Chúng ta truy cập vào đường dẫn repo
cd /etc/yum.repos.d/
Tạo file repo cho nginx
cat >> nginx.repo << "EOF"
[nginx]
name=nginx repo
baseurl=http://nginx.org/packages/centos/$releasever/$basearch/
gpgcheck=0
enabled=1
EOF
Cài đặt nginx
yum install nginx -y
Start service nginx
service nginx start
Chuyển tới bước tiếp theo
Cài đặt các package cần thiết để compile Nginx từ source
yum groupinstall " Development Tools"  -y
yum install zlib-devel pcre-devel openssl-devel wget -y
yum install epel-release -y
Cài đặt thêm các thành phần phụ thuộc của nginx
yum install perl perl-devel perl-ExtUtils-Embed libxslt libxslt-devel libxml2 libxml2-devel gd gd-devel GeoIP GeoIP-devel -y
Tiến hành download source nginx tại trang https://nginx.org/download/. Trong bài viết này sử dụng source version nginx 1.15.0
cd /usr/src/
wget https://nginx.org/download/nginx-1.15.0.tar.gz
tar -xzf nginx-1.15.0.tar.gz
Truy cập vào đường dẫn chứa source nginx vừa giải nén
cd nginx-1.15.0/
Tiến hành config từ script
./configure --prefix=/etc/nginx --sbin-path=/usr/sbin/nginx --error-log-path=/var/log/nginx/error.log --pid-path=/var/run/nginx.pid --lock-path=/var/run/nginx.lock --user=nginx --group=nginx
make
make install
Tạo user và tiến hành phân quyền owner cho thư mục
useradd nginx
chown -R nginx:nginx /etc/nginx/
Tạo file để chạy lệnh mỗi khi stop hoặc start service nginx
cat >> /usr/lib/systemd/system/nginx.service << "EOF"
[Unit]
Description=nginx - high performance web server
Documentation=https://nginx.org/en/docs/
After=network-online.target remote-fs.target nss-lookup.target
Wants=network-online.target

[Service]
Type=forking
PIDFile=/var/run/nginx.pid
ExecStartPre=/usr/sbin/nginx -t -c /etc/nginx/conf/nginx.conf
ExecStart=/usr/sbin/nginx -c /etc/nginx/conf/nginx.conf
ExecReload=/bin/kill -s HUP $MAINPID
ExecStop=/bin/kill -s TERM $MAINPID

[Install]
WantedBy=multi-user.target
EOF
Start Service nginx và cấu hình auto start service mỗi khi server reboot
systemctl start nginx
systemctl enable nginx
Chuyển tới bước tiếp theo
Kiểm tra lại cấu hình nginx xem đã chính xác chưa bằng lệnh bên dưới
Với kiểu cài đặt theo lệnh yum
nginx -t -c /etc/nginx/nginx.conf
Với kiều cài đặt theo Source
nginx -t -c /etc/nginx/conf/nginx.conf
Kết quả trả về như bên dưới là cài đặt đã thành công

Chúng ta tiến hành truy cập website từ máy Win Client với kết quả trả về như sau là hoàn thành

Thực hiện bởi cloud365.vn