Hướng dẫn khắc phục lỗ hổng bảo mật CVE-2019-11477 trên Cloud365
Hướng dẫn khắc phục lỗ hổng bảo mật CVE-2019-11477 trên Cloud365
Nơi chứa các tài liệu tham khảo của dịch vụ Cloud365.
Máy chủ Web (Web Server) là máy tính mà trên đó cài đặt phần mềm phục vụ web, đôi khi người ta cũng gọi chính phần mềm đó là web server. Tất cả các web server đều hiểu và chạy được các file *.htm và *.html. Tuy nhiên mỗi web server lại phục vụ một số kiểu file chuyên biệt chẳng hạn như llS của Microsoft dành cho *.asp, *.aspx…; Apache, Nginx dành cho *.php…; Sun Java system web server của SUN dành cho *.jsp…Trong bài viết này sẽ hướng dẫn người dùng tạo webserver sử dụng Nginx
Nginx là 1 máy chủ reverse proxy mã nguồn mở cho các giao thức HTTP, HTTPS, SMTP, POP3 và IMAP, cũng như là 1 máy chủ cân bằng tải (load balancer), HTTP cache và web Không giống với các máy chủ web truyền thống, Nginx không dựa trên luồn (thread) để xử lý yêu cầu. Thay vào đó, nó sử dụng 1 kiến trúc bất đồng bộ hướng sự kiện linh hoạt . Kiến trúc này sử dụng ít, nhưng quan trọng hơn, là lượng bộ nhớ có thể dự đoán khi hoạt động Nginx tập trung vào việc phục vụ số lượng kết nối đồng thời lớn (high concurrency), hiệu suất cao và sử dụng bộ nhớ thấp. Nginx được biết đến bởi sự ổn định cao, nhiều tính năng, cấu hình đơn giản và tiết kiệm tài nguyên
Chúng ta sẽ tiến hành cài đặt webserver sử dụng Nginx trên server cài đặt OS Centos 7.6.1810
Địa chỉ IP máy chủ: 10.10.11.162
Cài đặt: Cài đặt và cấu hình nginx kết hợp php
Chúng ta có thế update cho OS bằng lệnh
yum update -y
init 6
Sau khi reboot server online chúng ta truy cập lại ssh vào server với quyền root Chúng ta truy cập vào đường dẫn repo
cd /etc/yum.repos.d/
Tạo file repo cho nginx
cat >> nginx.repo << "EOF"
[nginx]
name=nginx repo
baseurl=http://nginx.org/packages/centos/$releasever/$basearch/
gpgcheck=0
enabled=1
EOF
yum install nginx -y
Start service
service nginx start
Cài đặt các package cần thiết để compile Nginx từ source
yum groupinstall " Development Tools"  -y
yum install zlib-devel pcre-devel openssl-devel -y
yum install epel-release -y
Cài đặt thêm các thành phần phụ thuộc của nginx
yum install perl perl-devel perl-ExtUtils-Embed libxslt libxslt-devel libxml2 libxml2-devel gd gd-devel GeoIP GeoIP-devel -y
Tiến hành download source nginx tại trang https://nginx.org/download/
wget https://nginx.org/download/nginx-1.15.0.tar.gz
tar -xzf nginx-1.15.0.tar.gz
Truy cập vào đường dẫn chứa source nginx vừa giải nén
cd nginx-1.15.0/
Tiến hành config từ script
./configure --prefix=/etc/nginx --sbin-path=/usr/sbin/nginx --error-log-path=/var/log/nginx/error.log --pid-path=/var/run/nginx.pid --lock-path=/var/run/nginx.lock --user=nginx --group=nginx
make
make install
Tạo user và tiến hành phân quyền owner cho thư mục
useradd nginx
chown -R nginx:nginx /etc/nginx/
Tạo file để chạy lệnh mỗi khi stop hoặc start service nginx
cat >> /usr/lib/systemd/system/nginx.service << "EOF"
[Unit]
Description=nginx - high performance web server
Documentation=https://nginx.org/en/docs/
After=network-online.target remote-fs.target nss-lookup.target
Wants=network-online.target

[Service]
Type=forking
PIDFile=/var/run/nginx.pid
ExecStartPre=/usr/sbin/nginx -t -c /etc/nginx/conf/nginx.conf
ExecStart=/usr/sbin/nginx -c /etc/nginx/conf/nginx.conf
ExecReload=/bin/kill -s HUP $MAINPID
ExecStop=/bin/kill -s TERM $MAINPID

[Install]
WantedBy=multi-user.target
EOF
Start Service nginx
systemctl start nginx
systemctl enable nginx
Truy cập vào đường dẫn chứa file config của nginx
cd /etc/nginx/conf
Backup lại file nginx.conf
mv nginx.conf nginx.conf.bak
Sửa file cấu hình Nginx
cat >> nginx.conf << "EOF"
user  nginx;
worker_processes  1;

error_log  /var/log/nginx/error.log warn;
pid        /var/run/nginx.pid;


events {
    worker_connections  1024;
}


http {
    include       mime.types;
    default_type  application/octet-stream;

    log_format  main  '$remote_addr - $remote_user [$time_local] "$request" '
                      '$status $body_bytes_sent "$http_referer" '
                      '"$http_user_agent" "$http_x_forwarded_for"';

    access_log  /var/log/nginx/access.log  main;

    sendfile        on;
    #tcp_nopush     on;

    keepalive_timeout  65;

    #gzip  on;

    include /etc/nginx/conf.d/*.conf;
}
EOF
Tạo thư mục chứa các file cấu hình virtualhost cho các website
mkdir -p /etc/nginx/conf.d/
yum install -y php-common php-bcmath php-cli php-devel php-mcrypt php-mysql php-password-compat php-pclzip php-pdo php-gd php-imap php-ldap php-odbc php-pear php-xml php-xmlrpc php-dba php-embedded php-enchant php-mbstring php-intl libssh2 php-pecl-ssh2 php-pecl-memcached php-pecl-memcache php-fpm
Cấu hình php-fpm
sed -i 's/user = apache/user = nginx/'g /etc/php-fpm.d/www.conf
sed -i 's/group = apache/group = nginx/'g /etc/php-fpm.d/www.conf
service php-fpm restart
Truy cập vào đường dẫn chứa code chung của các website và tạo thư mục riêng chứa code của site thangth.name.vn
cd /var/www/html
mkdir thangth.name.vn
Truy cập đường dẫn chứa các file cấu hình của virtualhost
cd /etc/nginx/conf.d/
Backup file cấu hình default
mv default.conf default.conf.bak
Tạo virtualhost trong Nginx
cat >> thangth.name.vn.conf << "EOF"
server {
    listen       80;
    server_name  thangth.name.vn;

location / {
        root   /var/www/html/thangth.name.vn;
        index  index.html index.php index.htm;
    }

location ~ \.php$ {
        root           /var/www/html/thangth.name.vn;
        fastcgi_pass   127.0.0.1:9000;
        fastcgi_index  index.php;
        fastcgi_param  SCRIPT_FILENAME  $document_root$fastcgi_script_name;
        include        fastcgi_params;
    }
}
EOF
Restart lại service nginx
service nginx restart
Trong bài viết này sử dụng domain thangth.name.vn để cấu hình virtualhost, người dùng cần thay đổi tên domain cũng như đường dẫn chứa code phù hợp Truy cập đường dẫn chứa code của site thangth.name.vn
cd /var/www/html/thangth.name.vn
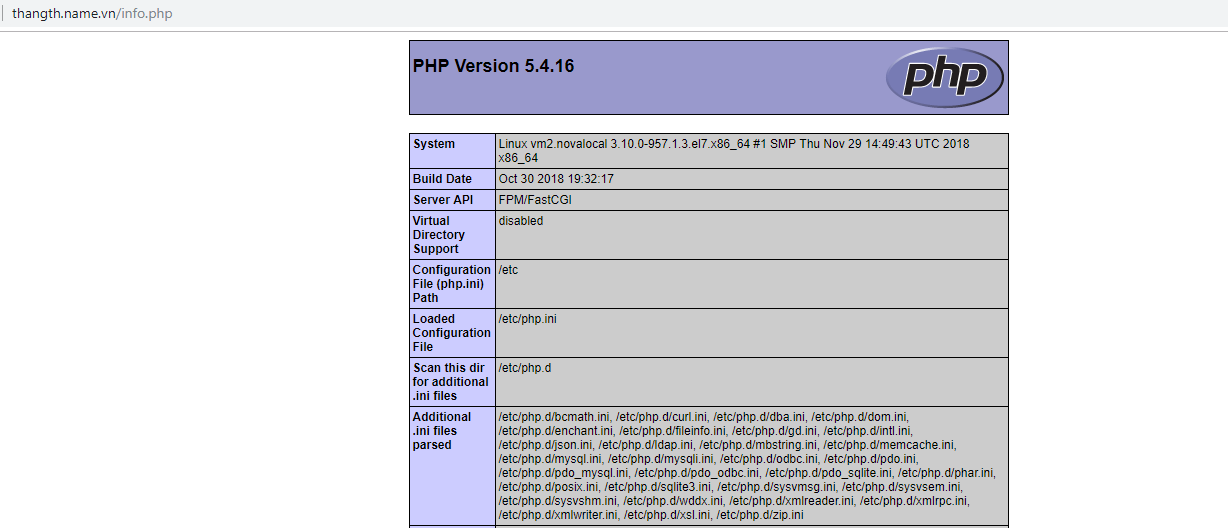
Chúng ta tiến hành tạo 1 file info.php trong thư mục /var/www/html/thangth.name.vn để kiểm tra website
cat >> info.php << "EOF"
<?php
phpinfo();
?>
EOF
Sau đó chúng ta truy cập đường dẫn http://thangth.name.vn/info.php trả về kết quả như hình bên dưới
Thực hiện bởi cloud365.vn