Hướng dẫn khắc phục lỗ hổng bảo mật CVE-2019-11477 trên Cloud365
Hướng dẫn khắc phục lỗ hổng bảo mật CVE-2019-11477 trên Cloud365
Nơi chứa các tài liệu tham khảo của dịch vụ Cloud365.
Webvirtmgr là một trong những công cụ quản lý máy ảo KVM. Nó có chức năng gần giống với virt-manager khi có thể kết nối đến nhiều host KVM để có thể quản lý tập trung các VM trên các máy đó. Nhưng nó có một ưu điểm đặc biệt hơn so với virt-manager đó là với virt-manager đó là ta chỉ có thể làm việc tại máy cài virt-manager. Còn với Webvirtmgr ta có thể làm việc với các VM ở bất kỳ đâu có internet.
Một máy cài đặt hệ điều hành Ubuntu server 16 có cấu hình tối thiểu 1 CPU, 1 GB RAM và có 1 card mạng.
Ít nhất một máy Ubuntu đã cài đặt KVM để kiểm tra lại webvirtmgr đã hoạt động.
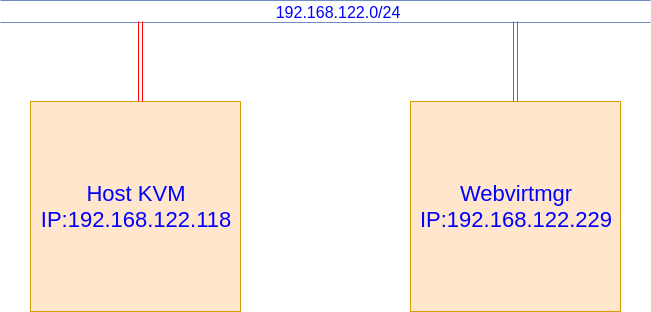
Vì đây là môi trường lap nên tôi dùng địa chỉ IP private nên chỉ có thể quản truy cập vào Webvirtmgr trong môi trường mạng LAN. Nếu bạn muốn truy cập vào Webvirtmgr ở bất kỳ đâu thì bạn Server cài Webvirt của bạn cần có IP public.
Bước 1: Cài một số gói cần thiết
apt-get install git python-pip python-libvirt python-libxml2 novnc supervisor nginx
Bước 2: Clone Webvirtmgr từ GitHub và cài đặt
git clone git://github.com/retspen/webvirtmgr.git

cd webvirtmgr

export LC_ALL=C

pip install -r requirements.txt
Sau đó ta chạy lệnh để thiết lập môi trường Django và tạo ra một tài khoản để đăng nhập Webvirtmgr
./manage.py syncdb
Nó sẽ hiển thị để cho ta nhập một số thông số cần thiết như username, địa chỉ E-mail, và password
You just installed Django's auth system, which means you don't have any superusers defined.

Would you like to create one now? (yes/no): yes

Username (leave blank to use 'root'):

Email address:

Password:

Password (again):

Superuser created successfully.

Installing custom SQL ...

Installing indexes ...

Installed 6 object(s) from 1 fixture(s)
Sau đó tiếp tục chạy lệnh
./manage.py collectstatic
Move thư mục webvirtmgr và trong thư mục /var/www
mkdir /var/www

cd ../

mv webvirtmgr /var/www/
Bước 3: Cài đặt nginx
Mở file webvirtmgr (ban đầu file này chưa tồn tại câu lệnh bên dưới cũng tiến hành tạo file)
vi /etc/nginx/conf.d/webvirtmgr.conf
Thêm vào file những dòng như sau
server {
    listen 80 default_server;

    server_name $hostname;
    #access_log /var/log/nginx/webvirtmgr_access_log;

    location /static/ {
        root /var/www/webvirtmgr/webvirtmgr; # or /srv instead of /var
        expires max;
    }

    location / {
        proxy_pass http://127.0.0.1:8000;
        proxy_set_header X-Real-IP $remote_addr;
        proxy_set_header X-Forwarded-for $proxy_add_x_forwarded_for;
        proxy_set_header Host $host:$server_port;
        proxy_set_header X-Forwarded-Proto $scheme;
        proxy_connect_timeout 600;
        proxy_read_timeout 600;
        proxy_send_timeout 600;
        client_max_body_size 1024M; # Set higher depending on your needs
    }
}
Vào file /etc/nginx/sites-enabled/default
vi /etc/nginx/sites-enabled/default
Comment lại những dòng sau
#    server {
#        listen       80 default_server;
#        server_name  localhost;
#        root         /usr/share/nginx/html;
#
#        #charset koi8-r;
#
#        #access_log  /var/log/nginx/host.access.log  main;
#
#        # Load configuration files for the default server block.
#        include /etc/nginx/default.d/*.conf;
#
#        location / {
#        }
#
#        # redirect server error pages to the static page /40x.html
#        #
#        error_page  404              /404.html;
#        location = /40x.html {
#        }
#
#        # redirect server error pages to the static page /50x.html
#        #
#        error_page   500 502 503 504  /50x.html;
#        location = /50x.html {
#        }
#    }
Khởi động lại nginx và cho nó khởi động cùng hệ thống
service nginx restart
systemctl enable nginx
Bước 4: Setup Supervisor
Cấp quyền cho người dùng
chown -R www-data:www-data /var/www/webvirtmgr
Mở file webvirtmgr.conf (file này ban đầu cũng chưa tồn tại)
vi /etc/supervisor/conf.d/webvirtmgr.conf
Thêm vào những dòng sau:
[program:webvirtmgr]
command=/usr/bin/python /var/www/webvirtmgr/manage.py run_gunicorn -c /var/www/webvirtmgr/conf/gunicorn.conf.py
directory=/var/www/webvirtmgr
autostart=true
autorestart=true
stdout_logfile=/var/log/supervisor/webvirtmgr.log
redirect_stderr=true
user=www-data

[program:webvirtmgr-console]
command=/usr/bin/python /var/www/webvirtmgr/console/webvirtmgr-console
directory=/var/www/webvirtmgr
autostart=true
autorestart=true
stdout_logfile=/var/log/supervisor/webvirtmgr-console.log
redirect_stderr=true
user=www-data
Restart và cho supervisor khởi động cùng hệ thống
service supervisor stop
service supervisor start
systemctl enable supervisor
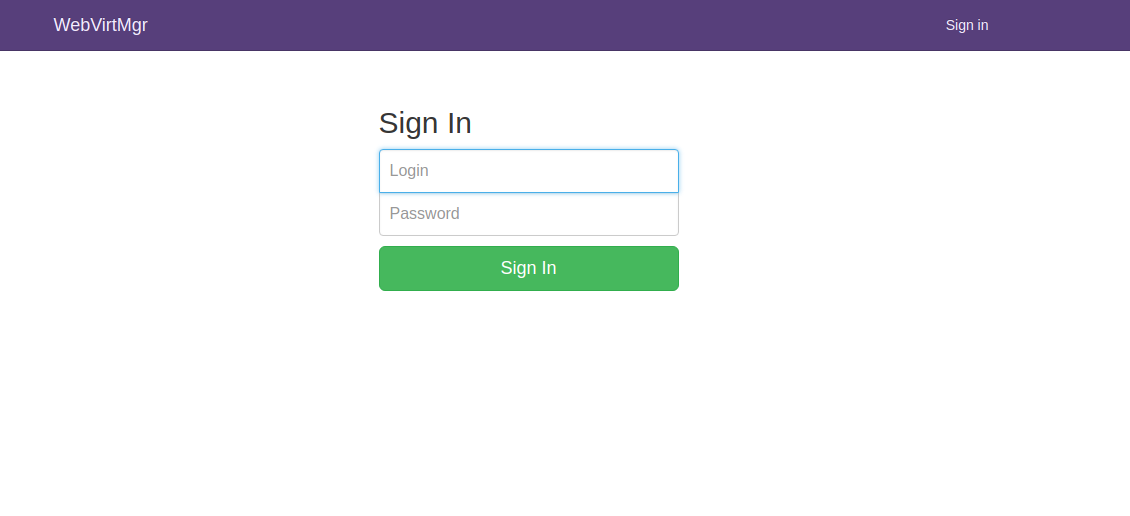
Đến đây bạn đã cài đặt xong Webvirtmgr. Bạn mở trình duyệt và truy cập vào địa chỉ của server cài webvirtmgr. Kết quả như sau:
Để Webvirtmgr có thể kết nối đến Host KVM và quản lý được các VM trong host KVM ta cần cấu hình một số thông tin sau trên host KVM
Thực hiện lần lượt các lệnh sau
sed -i 's/#listen_tls = 0/listen_tls = 0/g' /etc/libvirt/libvirtd.conf
sed -i 's/#listen_tcp = 1/listen_tcp = 1/g' /etc/libvirt/libvirtd.conf
sed -i 's/#tcp_port = "16509"/tcp_port = "16509"/g' /etc/libvirt/libvirtd.conf
sed -i 's/#listen_addr = "192.168.0.1"/listen_addr = "0.0.0.0"/g' /etc/libvirt/libvirtd.conf
Lưu ý nếu bạn không muốn xác thực trong quá trình kết nối qemu+tcp ta thực hiện lệnh sau (chỉ nên dùng trong môi trường lab)
sed -i 's/#auth_tcp = "sasl"/auth_tcp = "none"/g' /etc/libvirt/libvirtd.conf
Còn nếu bạn muốn xác thực để tiến hành kết nối qemu+tcp bạn thực hiện câu lệnh sau
sed -i 's/#auth_tcp = "sasl"/auth_tcp = "sasl"/g' /etc/libvirt/libvirtd.conf
Tiếp tục thực hiện các lệnh sau:
sed -i 's/#user = "root"/user = "root"/g' /etc/libvirt/qemu.conf
sed -i 's/#group = "root"/group = "root"/g' /etc/libvirt/qemu.conf
sed -i 's/#libvirtd_opts=""/libvirtd_opts="-l"/g' /etc/default/libvirt-bin
Restart libvirt-bin
service libvirt-bin restart
Nếu bên trên bạn để xác thực kết nối qemu+tcp thì bạn cần thực hiện thêm một lệnh sau:
Tiến hành cài đặt gói cyrus-sasl-md5
apt-get install sasl2-bin
sed -i 's/#sasldb_path: /etc/libvirt/passwd.db/#sasldb_path: /etc/libvirt/passwd.db/g' /etc/sasl2/libvirt.conf
Sau đó tiến hành restart lại libvirt-bin
service libvirt-bin restart
Sau đó ta cần tạo user để xác thực cho kết nối qemu+tcp
Tạo user
saslpasswd2 -a libvirt username
Show các user
sasldblistusers2 -f /etc/libvirt/passwd.db
Để xóa user
saslpasswd2 -a libvirt -d username
Bạn có thể tham khảo cách sử dụng webvirtmgr tại đây
Đến đây ta đã tạo thành công công cụ Webvirtmgr trên Ubuntu 16 và có thể kết nó được với host KVM chạy hệ điều hành Ubuntu 16. Để biết cách cài đặt Webvirtmgr trên CentOS 7 bạn tham khảo tại đây. Trong bài viết chắc chắn còn nhiều thiếu sót rất mong được sự góp ý của các bạn.
Chúc bạn thành công!
Tài liệu tham khảo
https://github.com/MinhKMA/meditech-thuctap/blob/master/MinhNV/KVM/docs/th%E1%BB%B1c%20h%C3%A0nh/install_webvirt_U14.md
Thực hiện bởi cloud365.vn