Hướng dẫn khắc phục lỗ hổng bảo mật CVE-2019-11477 trên Cloud365
Hướng dẫn khắc phục lỗ hổng bảo mật CVE-2019-11477 trên Cloud365
Nơi chứa các tài liệu tham khảo của dịch vụ Cloud365.
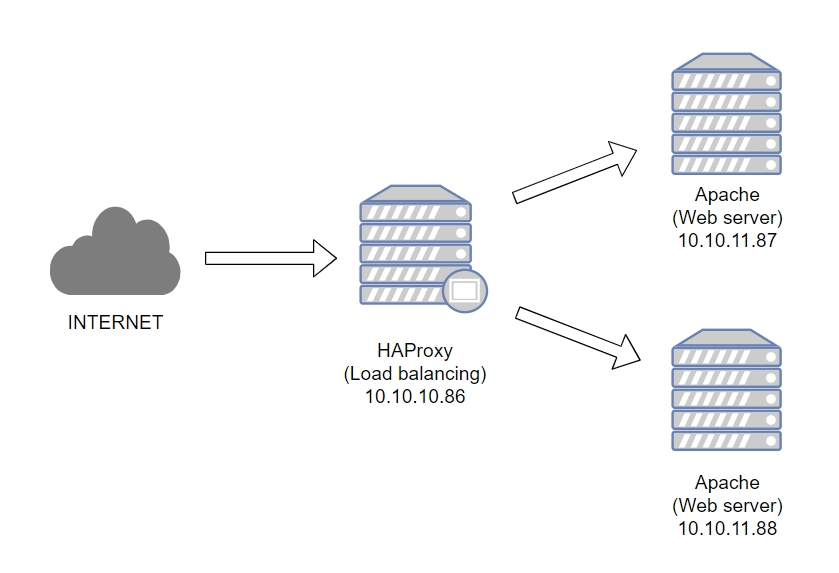
Tài liệu hướng dẫn hướng dẫn cấu hình HAProxy làm load balancing cho Apache
Load balancing là kỹ thuật phân phối tải trên các web site có lượng truy cập cao. Giải pháp hỗ trợ việc tối ưu hóa tài nguyên, tăng sự đảm bảo, giảm độ trễ trên hệ thống.
Các thuật toán cân bằng tải cơ bản:
HAProxy viết tắt (High Availability Proxy) là phần mềm mã nguồn mở, cung cấp dịch vụ cân bằng tải, proxy cho TCP/HTTP dựa trên request người dùng. HAProxy hiện đã và đang được sử dụng bởi nhiều website lớn như GoDaddy, GitHub, Bitbucket, Stack Overflow, Reddit, Speedtest.net, Twitter và trong nhiều sản phẩm cung cấp bởi Amazon Web Service.

loadbalancerThiết lập hostname, cập nhật hệ thống
hostnamectl set-hostname loadbalancer
yum update -y
Tắt Firewall và SELinux
sed -i 's/SELINUX=enforcing/SELINUX=disabled/g' /etc/sysconfig/selinux
sed -i 's/SELINUX=enforcing/SELINUX=disabled/g' /etc/selinux/config
systemctl stop firewalld
systemctl disable firewalld
Cấu hình Host file
echo "10.10.11.86 loadbalancer" >> /etc/hosts
echo "10.10.11.87 web1" >> /etc/hosts
echo "10.10.11.88 web2" >> /etc/hosts
Khởi động lại hệ thống
init 6
web1Thiết lập hostname, cập nhật hệ thống
hostnamectl set-hostname web1
yum update -y
Tắt Firewall và SELinux
sed -i 's/SELINUX=enforcing/SELINUX=disabled/g' /etc/sysconfig/selinux
sed -i 's/SELINUX=enforcing/SELINUX=disabled/g' /etc/selinux/config
systemctl stop firewalld
systemctl disable firewalld
Cấu hình Host file
echo "10.10.11.86 loadbalancer" >> /etc/hosts
echo "10.10.11.87 web1" >> /etc/hosts
echo "10.10.11.88 web2" >> /etc/hosts
Khởi động lại hệ thống
init 6
web2Thiết lập hostname, cập nhật hệ thống
hostnamectl set-hostname web2
yum update -y
Tắt Firewall và SELinux
sed -i 's/SELINUX=enforcing/SELINUX=disabled/g' /etc/sysconfig/selinux
sed -i 's/SELINUX=enforcing/SELINUX=disabled/g' /etc/selinux/config
systemctl stop firewalld
systemctl disable firewalld
Cấu hình Host file
echo "10.10.11.86 loadbalancer" >> /etc/hosts
echo "10.10.11.87 web1" >> /etc/hosts
echo "10.10.11.88 web2" >> /etc/hosts
Khởi động lại hệ thống
init 6
Thực hiện tại node loadbalancer
Lưu ý:
Cài đặt
sudo yum install wget socat -y
wget http://cbs.centos.org/kojifiles/packages/haproxy/1.8.1/5.el7/x86_64/haproxy18-1.8.1-5.el7.x86_64.rpm
yum install haproxy18-1.8.1-5.el7.x86_64.rpm -y
Tạo bản backup cho cấu hình mặc định và chỉnh sửa cấu hình HAproxy
cp /etc/haproxy/haproxy.cfg /etc/haproxy/haproxy.cfg.bak
echo 'global
    log         127.0.0.1 local2
    chroot      /var/lib/haproxy
    pidfile     /var/run/haproxy.pid
    maxconn     4000
    user        haproxy
    group       haproxy
    daemon
    stats socket /var/lib/haproxy/stats
defaults
    mode                    http
    log                     global
    option                  httplog
    option                  dontlognull
    option http-server-close
    option forwardfor       except 127.0.0.0/8
    option                  redispatch
    retries                 3
    timeout http-request    10s
    timeout queue           1m
    timeout connect         10s
    timeout client          1m
    timeout server          1m
    timeout http-keep-alive 10s
    timeout check           10s
    maxconn                 3000

listen stats
    bind :8080
    mode http
    stats enable
    stats uri /stats
    stats realm HAProxy\ Statistics

listen webcluster
    bind :80
    balance  roundrobin
    mode  http
    option  forwardfor
    server web1 10.10.11.87:80 check
    server web2 10.10.11.88:80 check' > /etc/haproxy/haproxy.cfg
Khởi động lại dịch vụ HAProxy
sudo systemctl enable haproxy
sudo systemctl restart haproxy
Thực hiện tại web1
yum install httpd -y
cat /etc/httpd/conf/httpd.conf | grep 'Listen 80'
sed -i "s/Listen 80/Listen 10.10.11.87:80/g" /etc/httpd/conf/httpd.conf
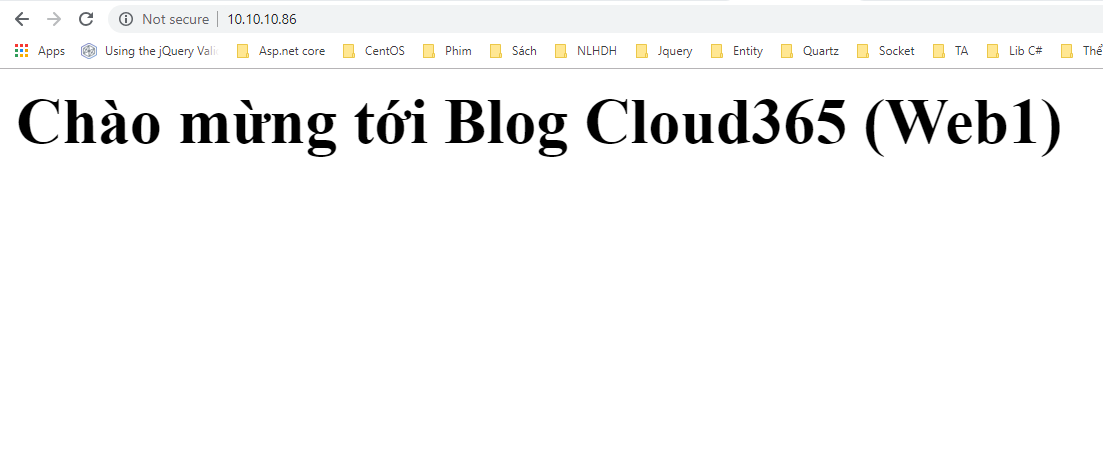
echo '<h1>Chào mừng tới Blog Cloud365 (Web1)</h1>' > /var/www/html/index.html
systemctl start httpd
systemctl enable httpd
Thực hiện tại web2
yum install httpd -y
cat /etc/httpd/conf/httpd.conf | grep 'Listen 80'
sed -i "s/Listen 80/Listen 10.10.11.88:80/g" /etc/httpd/conf/httpd.conf
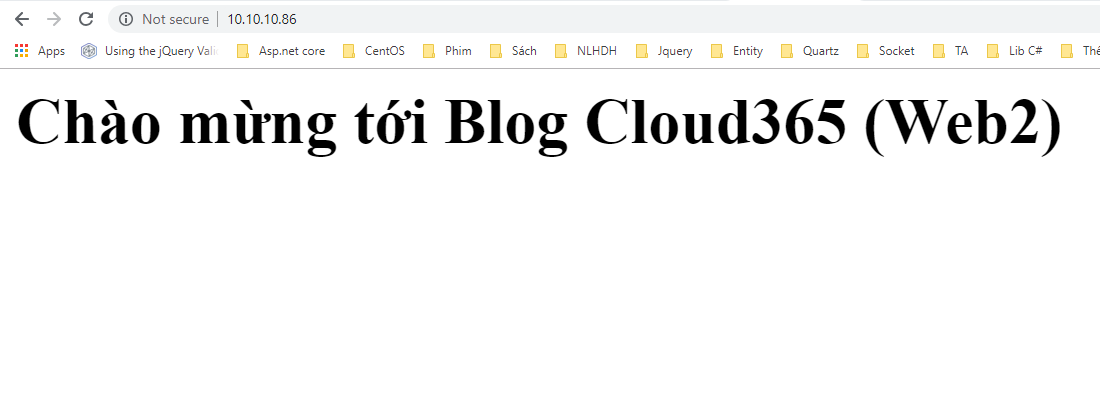
echo '<h1>Chào mừng tới Blog Cloud365 (Web2)</h1>' > /var/www/html/index.html
systemctl start httpd
systemctl enable httpd
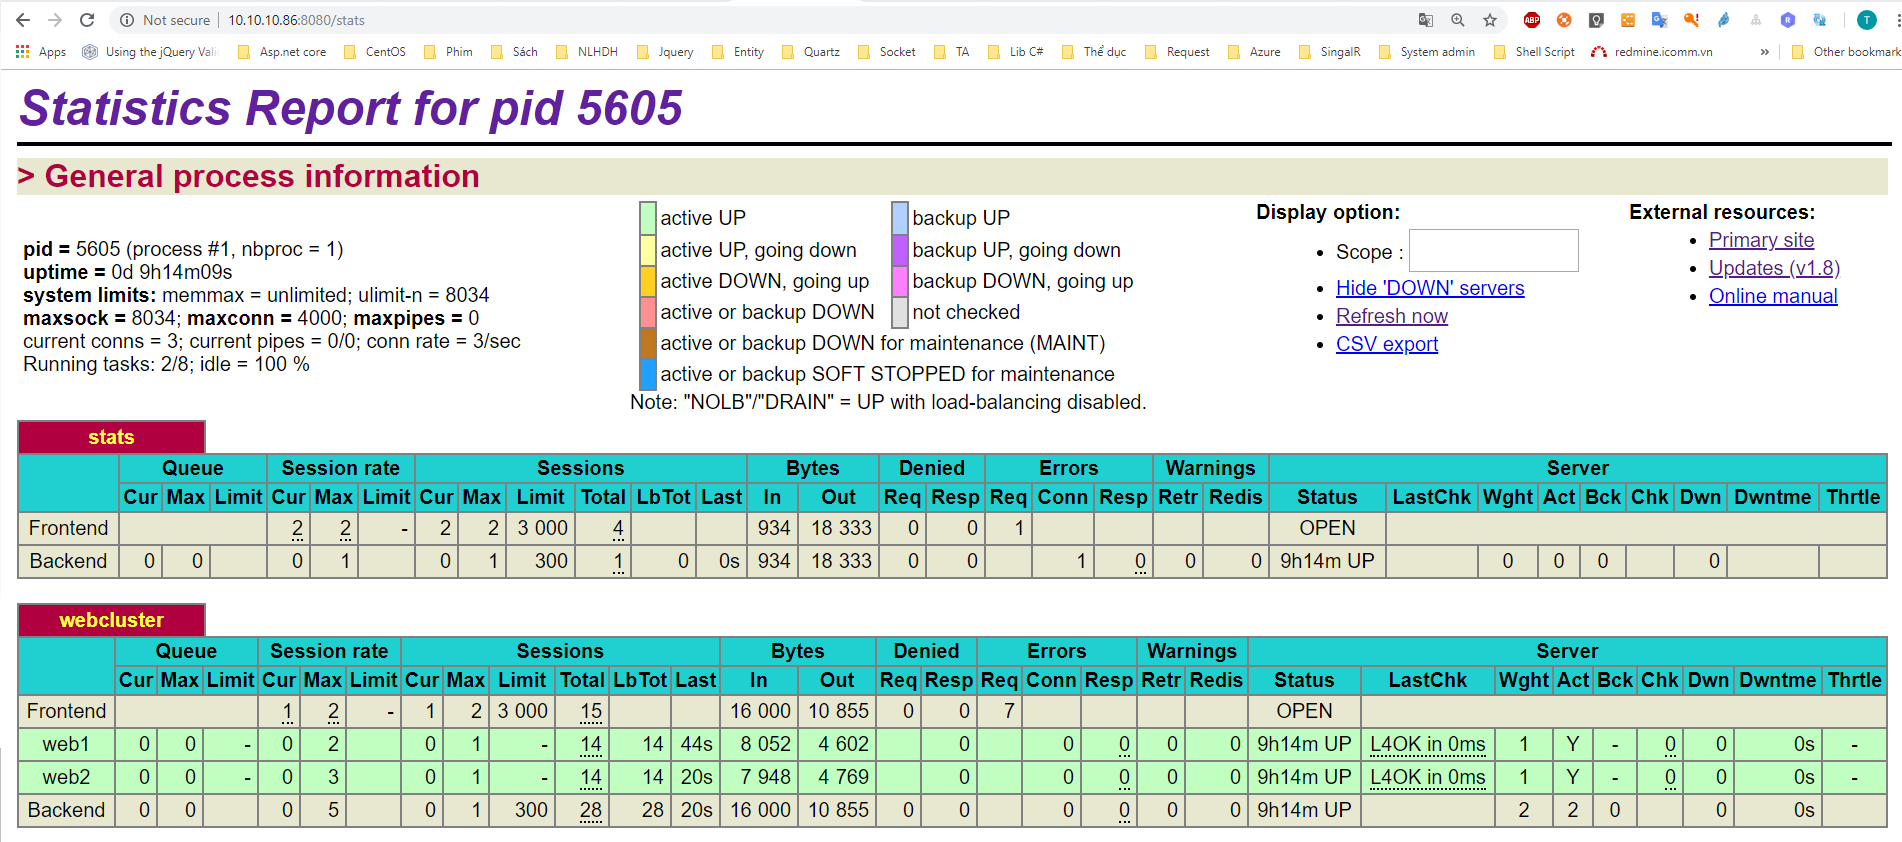
Truy cập địa chỉ http://10.10.10.86:8080/stats
Kết quả
Kết quả lần 1
Kết quả lần 2
Mặc định HAProxy sẽ gửi log tới rsyslog trên IP local.
Kiểm tra cấu hình log mặc định
cat /etc/haproxy/haproxy.cfg | grep ^global -A 1
Kết quả
global
    log         127.0.0.1 local2
rsyslog.confsed -i "s/#\$ModLoad imudp/\$ModLoad imudp/g" /etc/rsyslog.conf
sed -i "s/#\$UDPServerRun 514/\$UDPServerRun 514/g" /etc/rsyslog.conf
echo '$UDPServerAddress 127.0.0.1' >> /etc/rsyslog.conf
echo 'local2.* /var/log/haproxy.log' > /etc/rsyslog.d/haproxy.conf
systemctl restart rsyslog
systemctl restart haproxy
File cấu hình log
$ ll /var/log/haproxy.log
-rw------- 1 root root 4577 Feb  8 10:43 /var/log/haproxy.log
Nội dung
$ cat /var/log/haproxy.log

Feb  8 10:42:36 localhost haproxy[22465]: Proxy stats started.
Feb  8 10:42:36 localhost haproxy[22465]: Proxy webcluster started.
Feb  8 10:42:59 localhost haproxy[22466]: 10.10.10.2:55519 [08/Feb/2019:10:42:59.048] webcluster webcluster/web1 0/0/0/1/1 304 168 - - ---- 2/2/0/0/0 0/0 "GET / HTTP/1.1"
Feb  8 10:42:59 localhost haproxy[22466]: 10.10.10.2:55519 [08/Feb/2019:10:42:59.271] webcluster webcluster/web2 0/0/0/2/2 200 335 - - ---- 2/2/0/0/0 0/0 "GET / HTTP/1.1"
Feb  8 10:42:59 localhost haproxy[22466]: 10.10.10.2:55519 [08/Feb/2019:10:42:59.437] webcluster webcluster/web1 0/0/1/1/2 200 335 - - ---- 2/2/0/0/0 0/0 "GET / HTTP/1.1"
Feb  8 10:42:59 localhost haproxy[22466]: 10.10.10.2:55519 [08/Feb/2019:10:42:59.658] webcluster webcluster/web2 0/0/0/1/1 200 335 - - ---- 2/2/0/0/0 0/0 "GET / HTTP/1.1"
Feb  8 10:42:59 localhost haproxy[22466]: 10.10.10.2:55519 [08/Feb/2019:10:42:59.907] webcluster webcluster/web1 0/0/1/1/2 200 335 - - ---- 2/2/0/0/0 0/0 "GET / HTTP/1.1"
Feb  8 10:43:00 localhost haproxy[22466]: 10.10.10.2:55519 [08/Feb/2019:10:43:00.077] webcluster webcluster/web2 0/0/0/1/1 200 335 - - ---- 2/2/0/0/0 0/0 "GET / HTTP/1.1"
Thực hiện bởi cloud365.vn