Hướng dẫn khắc phục lỗ hổng bảo mật CVE-2019-11477 trên Cloud365
Hướng dẫn khắc phục lỗ hổng bảo mật CVE-2019-11477 trên Cloud365
Nơi chứa các tài liệu tham khảo của dịch vụ Cloud365.
Zabbix là một giải pháp monitor các thiết bị mạng, mã nguồn mở, có nhiều tính năng đặc biệt và khả năng tùy biến cao.
Zabbix có thể theo dõi các thông số về mạng và tình trạng của server, trạng thái của các thiết bị mạng, hỗ trợ các cách thức cảnh báo có độ tùy biến cao qua email, sms, telegram, slack. Chỉ cần cài đặt agent trên máy chủ Linux và Windows để theo dõi số liệu thống kê như tải CPU, sử dụng mạng, disk…Các thức cài đặt triển khai dễ dàng. Bài viết dưới đây của cloud365.vn sẽ hướng dẫn bạn các bước cơ bản để cài đặt zabbix server.
1. Mô hình triển khai
2. IP Planning
3. Thiết lập ban đầu
4. Các bước cài đặt
Mô hình triển khai một node zabbix-server, một hoặc nhiều các host zabbix client.
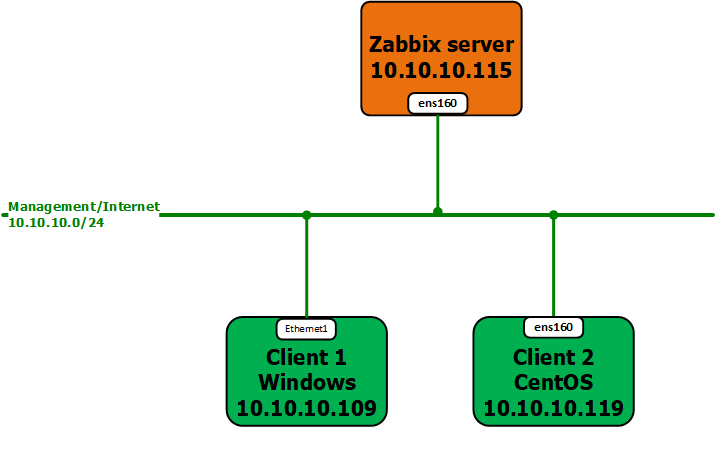

Lưu ý: Bạn có thể tùy chỉnh cấu hình theo số lượng host bạn muốn giám sát.
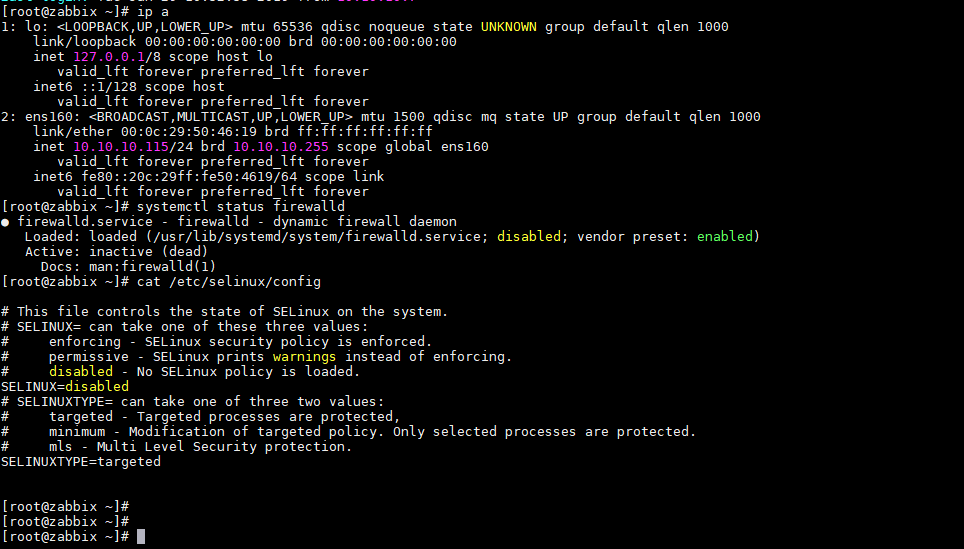
Cài đặt chuẩn bị server ban đầu bao gồm các thao tác: Đặt địa chỉ IP tĩnh cho server, đặt host-name, thiết lập firewalld, selinux.
Ở màn command line của server bạn thực hiện các câu lệnh dưới.
nmcli con modify ens160 ipv4.addresses 10.10.10.115/24
nmcli con modify ens160 ipv4.gateway 10.10.10.1
nmcli con modify ens160 ipv4.dns 8.8.8.8
nmcli con modify ens160 ipv4.method manual
nmcli con modify ens160 connection.autoconnect yes

sudo systemctl disable firewalld
sudo systemctl stop firewalld
sudo systemctl disable NetworkManager
sudo systemctl stop NetworkManager
sudo systemctl enable network
sudo systemctl start network

hostnamectl set-hostname zabbix

sed -i 's/SELINUX=enforcing/SELINUX=disabled/g' /etc/sysconfig/selinux
sed -i 's/SELINUX=enforcing/SELINUX=disabled/g' /etc/selinux/config
Restart lại server để cập nhật cấu hình mới.
Update các gói cài đặt
yum install epel-release
yum update -y
rpm -ivh https://repo.zabbix.com/zabbix/4.0/rhel/7/x86_64/zabbix-release-4.0-1.el7.noarch.rpm
yum -y install zabbix-server-mysql zabbix-web-mysql mysql mariadb-server httpd php
Start service mariadb và tự động start khi khởi động lại server.
systemctl start mariadb
systemctl enable mariadb
Thiết lập password root cho mysql
[root@zabbix ~]# mysql_secure_installation

NOTE: RUNNING ALL PARTS OF THIS SCRIPT IS RECOMMENDED FOR ALL MariaDB
      SERVERS IN PRODUCTION USE!  PLEASE READ EACH STEP CAREFULLY!

In order to log into MariaDB to secure it, we'll need the current
password for the root user.  If you've just installed MariaDB, and
you haven't set the root password yet, the password will be blank,
so you should just press enter here.

Enter current password for root (enter for none):
OK, successfully used password, moving on...

Setting the root password ensures that nobody can log into the MariaDB
root user without the proper authorisation.

Set root password? [Y/n] Y
New password:
Re-enter new password:
Password updated successfully!
Reloading privilege tables..
 ... Success!
Tạo một database cho zabbix
Login database mysql
[root@zabbix ~]# mysql -u root -p
Enter password:
Welcome to the MariaDB monitor.  Commands end with ; or \g.
Your MariaDB connection id is 11
Server version: 5.5.60-MariaDB MariaDB Server

Copyright (c) 2000, 2018, Oracle, MariaDB Corporation Ab and others.

Type 'help;' or '\h' for help. Type '\c' to clear the current input statement.
Xóa database zabbix_db nếu đã tồn tại.
MariaDB [(none)]> DROP DATABASE IF EXISTS zabbix_db;
Query OK, 0 rows affected, 1 warning (0.00 sec)
Tạo database có tên zabbix_db cho zabbix server
MariaDB [(none)]> create database zabbix_db character set utf8 collate utf8_bin;
Query OK, 1 row affected (0.00 sec)
Gán quyền cho user zabbix_user với mật khẩu là password cho database zabbix_db.
MariaDB [(none)]> grant all privileges on zabbix_db.* to zabbix_user@localhost identified by 'password';
Query OK, 0 rows affected (0.00 sec)
Áp dụng thay đổi và thoát khỏi mysql.
MariaDB [(none)]> flush privileges;
Query OK, 0 rows affected (0.00 sec)

MariaDB [(none)]> exit;
Bye
[root@zabbix ~]#

cd /usr/share/doc/zabbix-server-mysql-4.0.3
gunzip create.sql.gz
mysql -u root -p zabbix_db < create.sql
sed -i 's/# DBHost=localhost/DBHost=localhost/g' /etc/zabbix/zabbix_server.conf
sed -i "s/DBName=zabbix/DBName=zabbix_db/g" /etc/zabbix/zabbix_server.conf
sed -i "s/DBUser=zabbix/DBUser=zabbix_user/g" /etc/zabbix/zabbix_server.conf
sed -i "s/# DBPassword=/DBPassword=password/g" /etc/zabbix/zabbix_server.conf
sed -i 's/max_execution_time = 30/max_execution_time = 600/g' /etc/php.ini
sed -i 's/max_input_time = 60/max_input_time = 600/g' /etc/php.ini
sed -i 's/memory_limit = 128M/memory_limit = 256M/g' /etc/php.ini
sed -i 's/post_max_size = 8M/post_max_size = 32M/g' /etc/php.ini
sed -i 's/upload_max_filesize = 2M/upload_max_filesize = 16M/g' /etc/php.ini
echo "date.timezone = Asia/Ho_Chi_Minh" >> /etc/php.ini
zabbix-server, http, mariadbsystemctl start zabbix-server
systemctl enable zabbix-server
systemctl start httpd
systemctl enable httpd
systemctl restart zabbix-server
systemctl restart httpd
systemctl restart mariadb

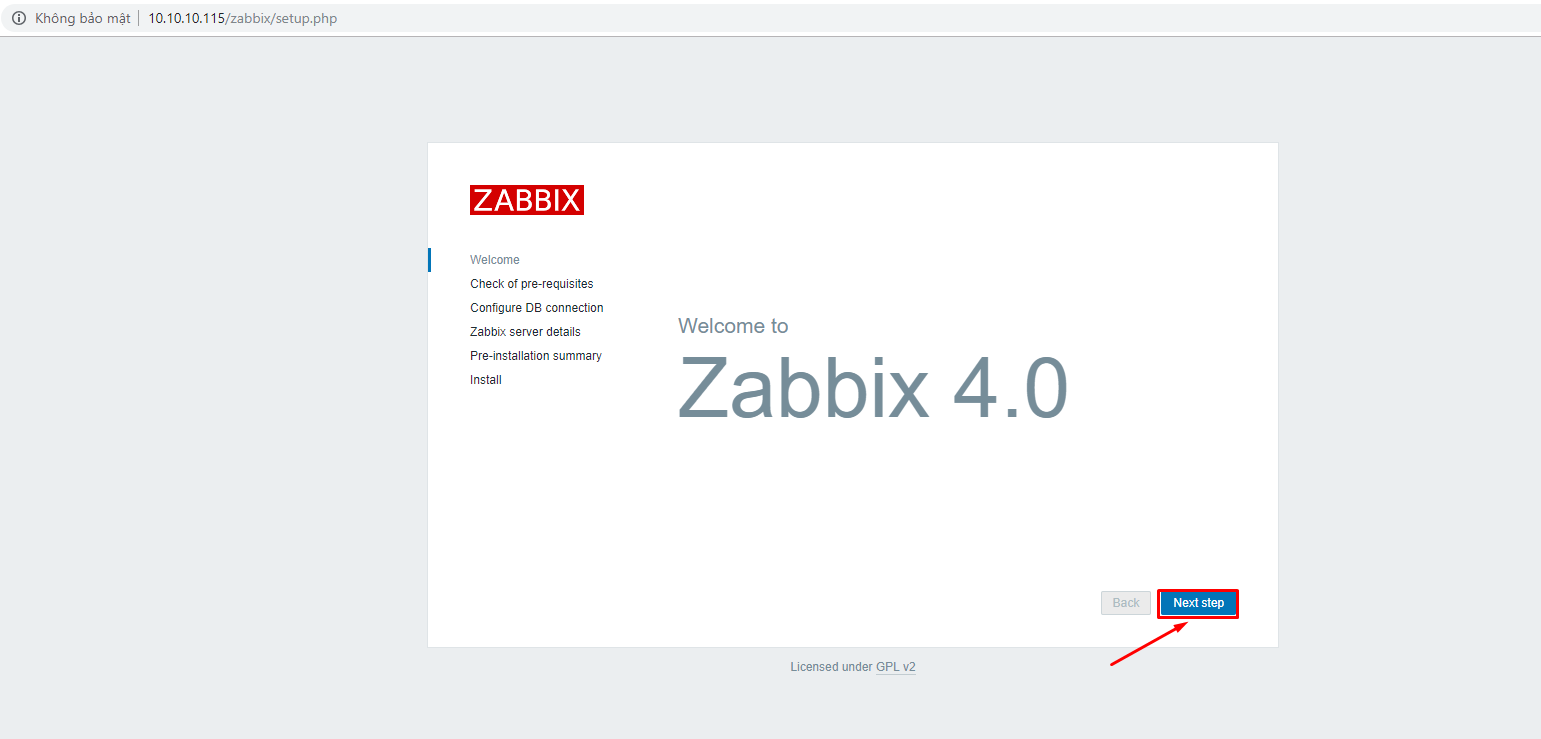
http://ipserver/zabbix
Giao diện cài đặt ban đầu zabbix. Click Next step
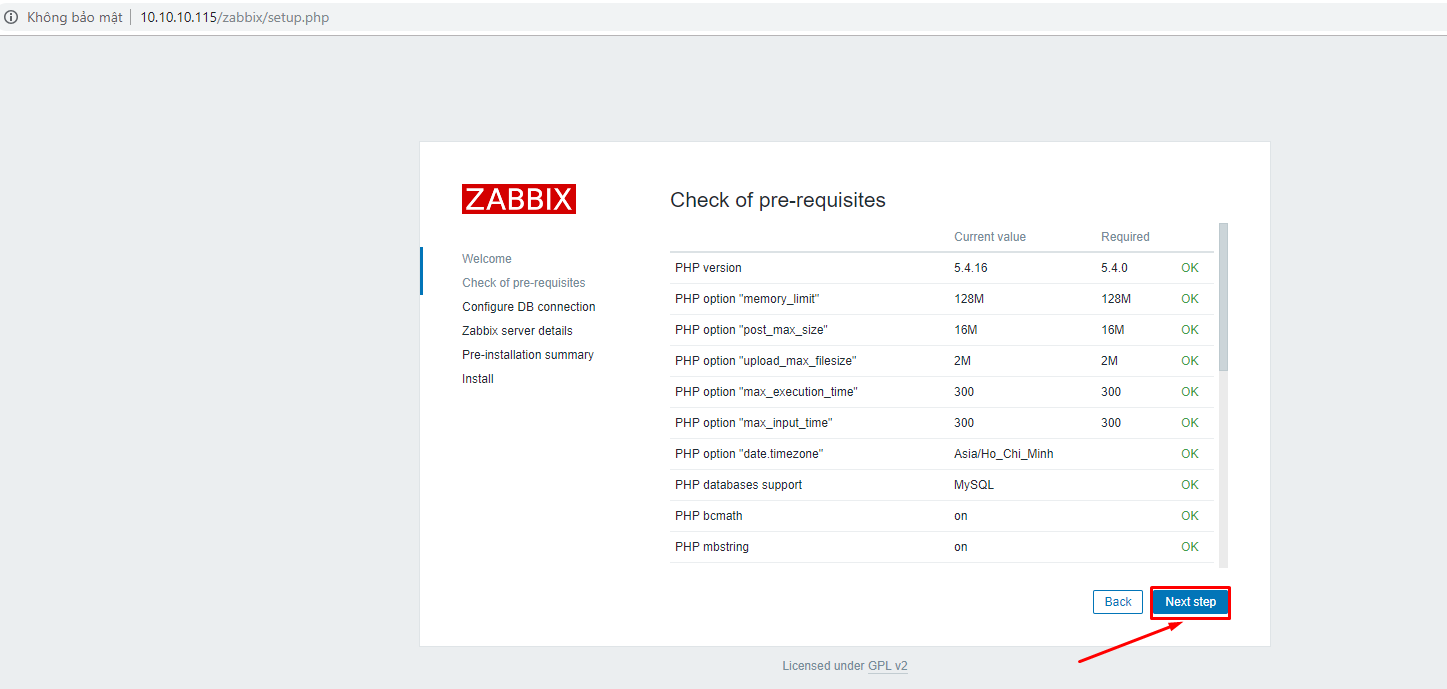
Thông số config php. Click Next step
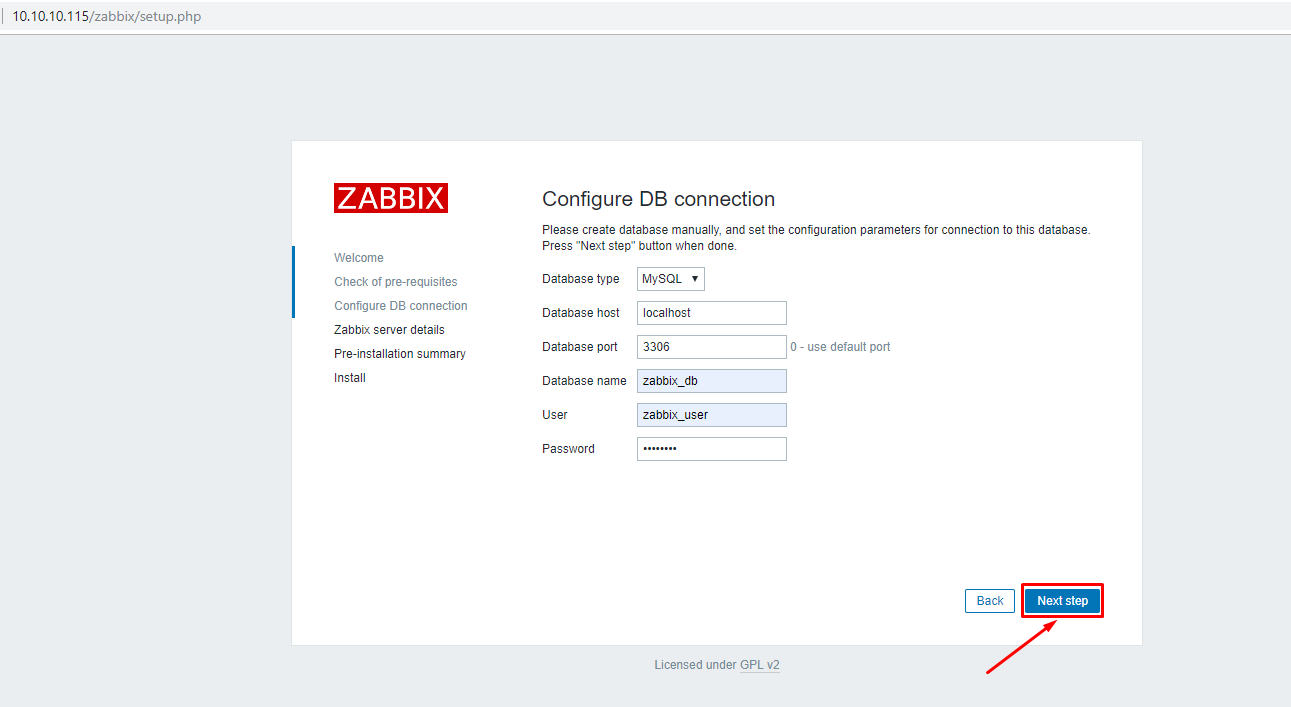
Nhập thông số về database zabbix đã thiết lập ở bước 2
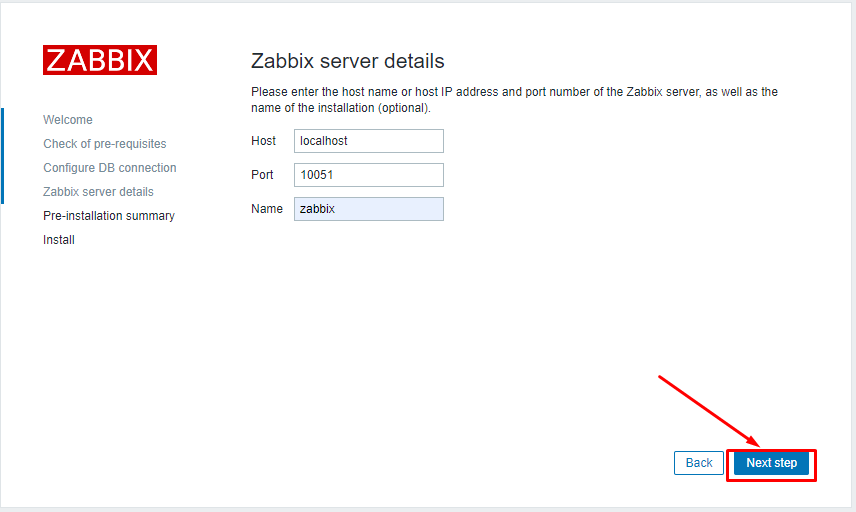
Zabbix server details
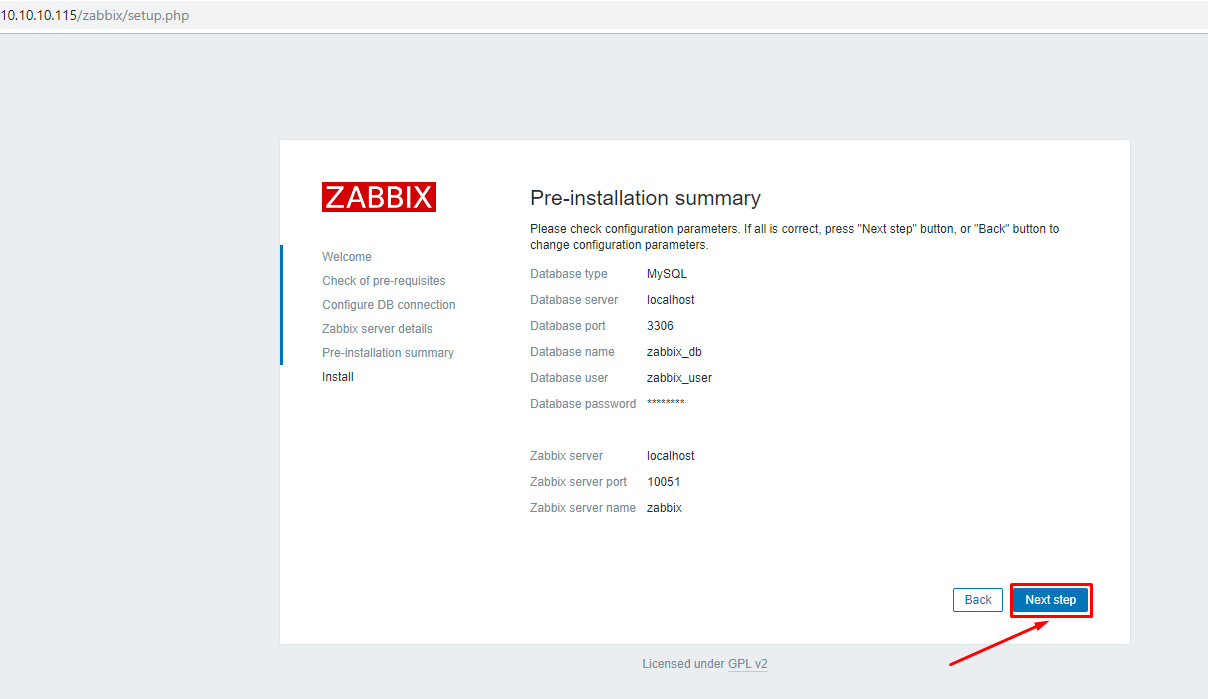
Pre-installation summary
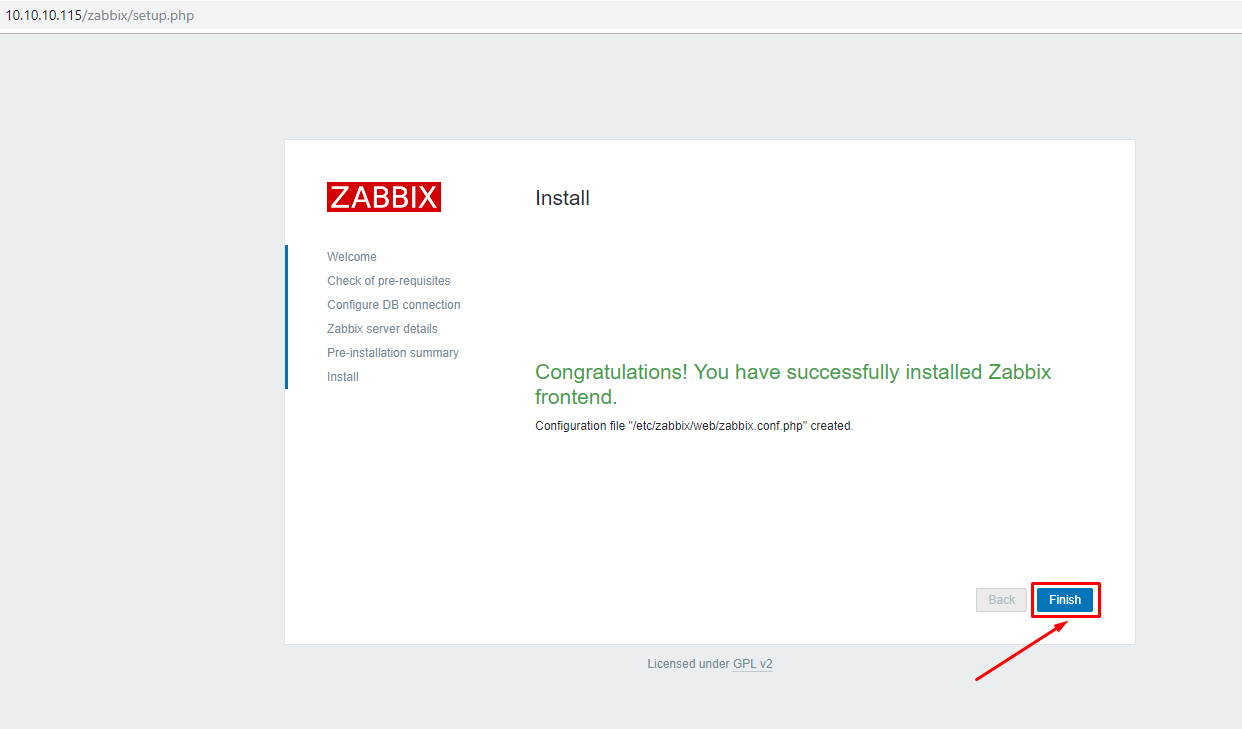
Kết thúc cài đặt. Click Finish
Truy cập địa chỉ trên trình duyệt: http://ip_zabbix_server
Sử dụng tài khoản default để login zabbix server Admin\zabbix
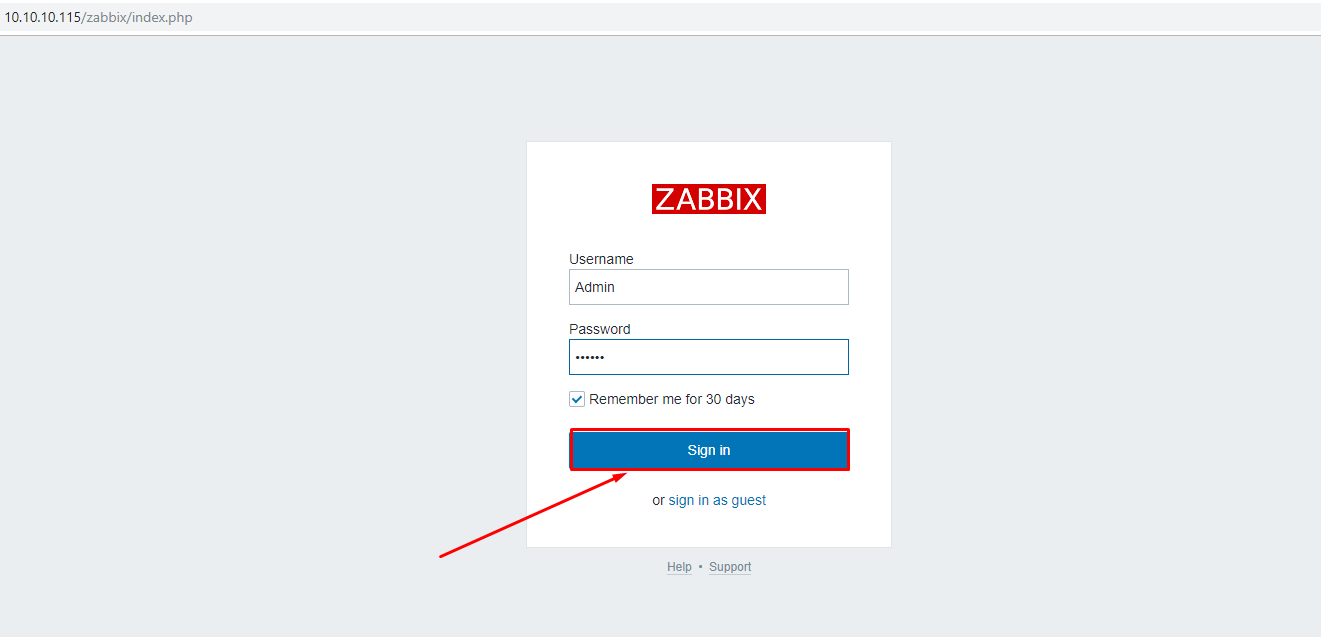
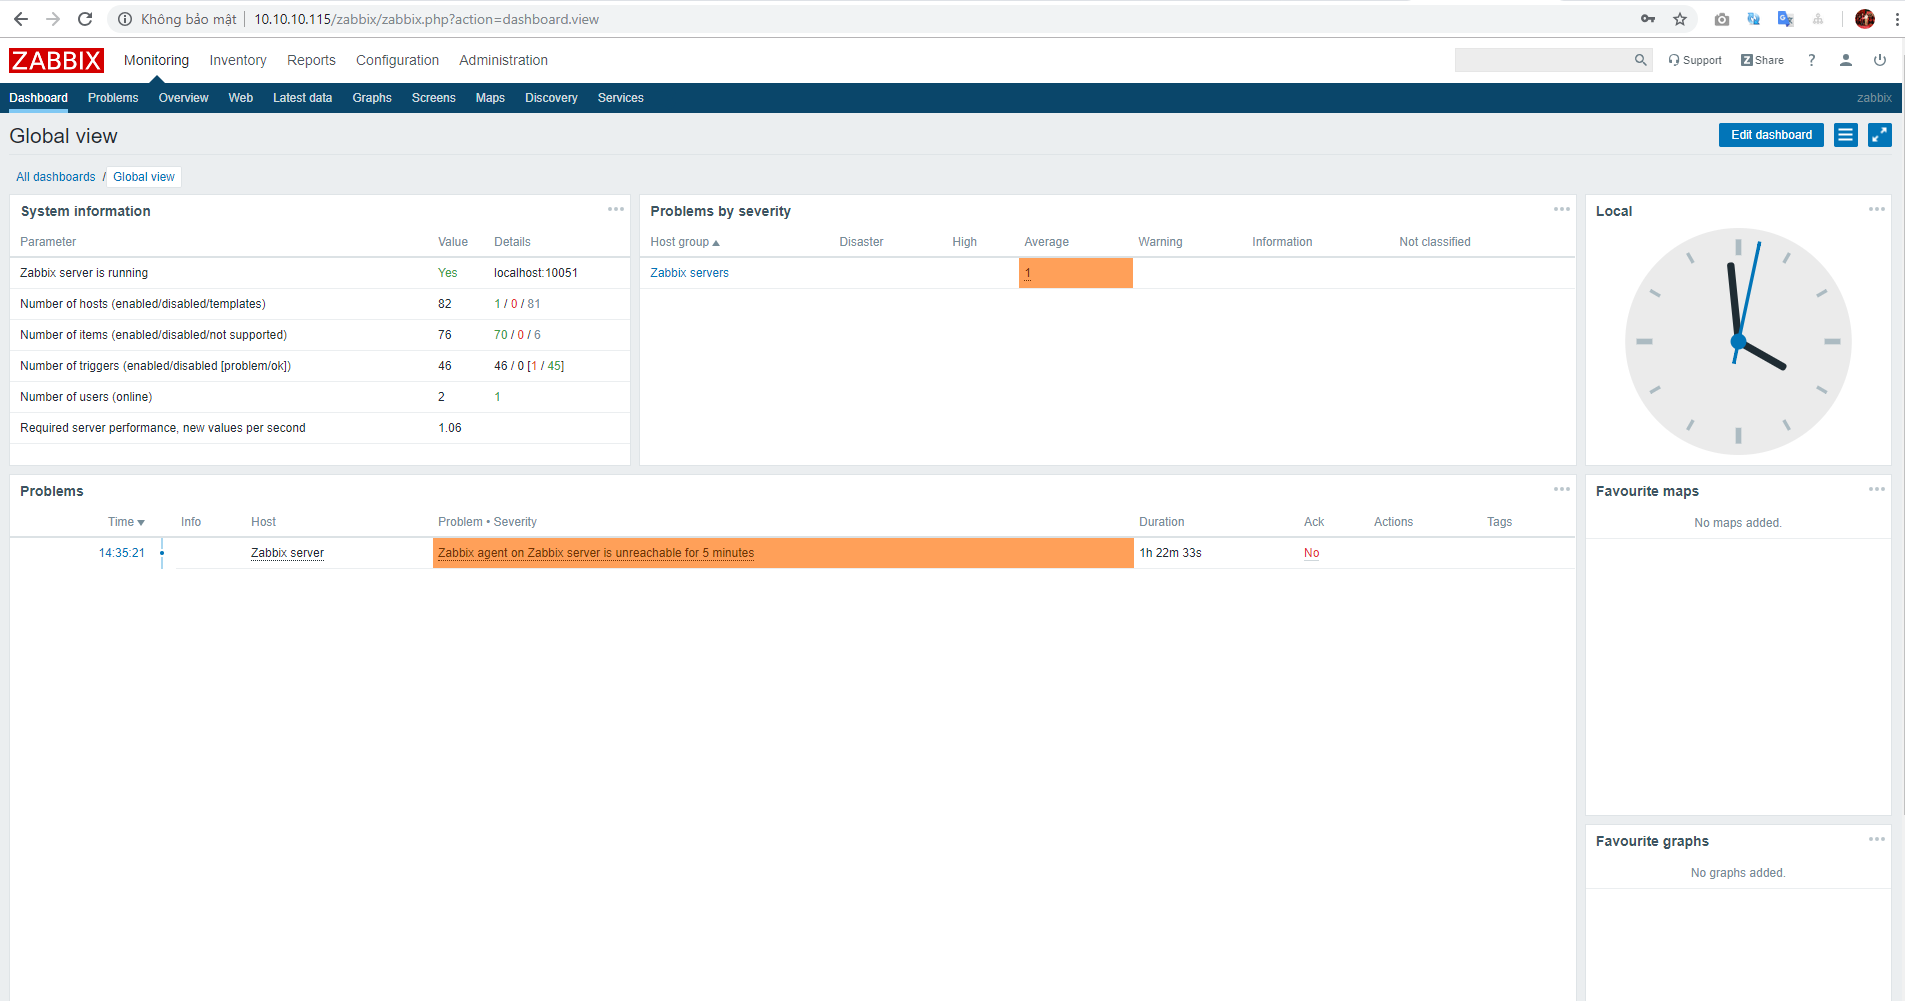
Login thành công.
Hy vọng những hướng dẫn trên giúp bạn triển khai zabbix server thành công!
Thực hiện bởi cloud365.vn