1. ELK part 6 - Tìm hiểu về logstash.
Tìm hiểu về logstash.
Nơi chứa các tài liệu tham khảo của dịch vụ Cloud365.
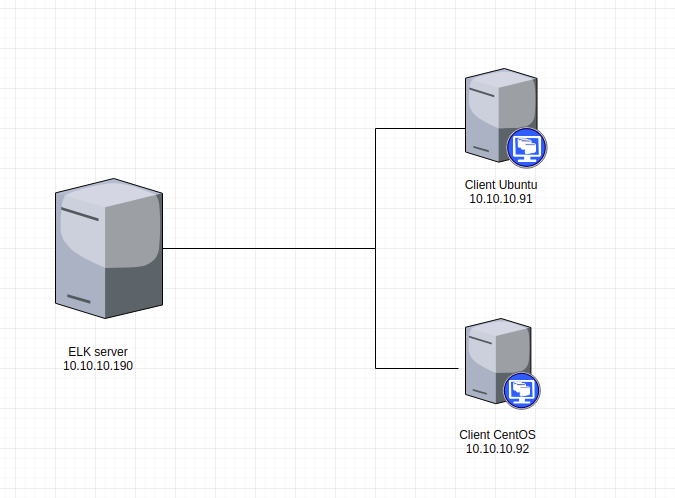
1 máy CentOS 7 làm ELK (aio) server : RAM 6GB, 100GB HDD.
Các máy client có OS là windows, ubuntu hoặc CentOS.

Import key elastic:
rpm --import http://packages.elastic.co/GPG-KEY-elasticsearch
Thêm repo elastic :
cat <<EOF > /etc/yum.repos.d/elasticsearch.repo
[elasticsearch-6.x]
name=Elasticsearch repository for 6.x packages
baseurl=https://artifacts.elastic.co/packages/6.x/yum
gpgcheck=1
gpgkey=https://artifacts.elastic.co/GPG-KEY-elasticsearch
enabled=1
autorefresh=1
type=rpm-md
EOF
Cài đặt Elastic :
yum install elasticsearch -y
Mở file /etc/elasticsearch/elasticsearch.yml:
vi /etc/elasticsearch/elasticsearch.yml
Tìm đến dòng network.host và sửa lại như sau :
network.host: localhost
Khởi động lại Elasticsearch và cho phép dịch vụ khởi động cùng hệ thống :
systemctl restart elasticsearch
systemctl enable elasticsearch
Kiểm tra dịch vụ Elasticseach :
curl -X GET http://localhost:9200
Kết quả trả về như sau :
[root@ELK-stack ~]# curl -X GET http://localhost:9200
{
"name" : "w5M4X9m",
"cluster_name" : "elasticsearch",
"cluster_uuid" : "3a8frDXuRUaxZnKi1Y_tFQ",
"version" : {
    "number" : "6.3.1",
    "build_flavor" : "default",
    "build_type" : "rpm",
    "build_hash" : "eb782d0",
    "build_date" : "2019-01-30T10:21:26.107521Z",
    "build_snapshot" : false,
    "lucene_version" : "7.3.1",
    "minimum_wire_compatibility_version" : "5.6.0",
    "minimum_index_compatibility_version" : "5.0.0"
},
"tagline" : "You Know, for Search"
}
Thêm repo logstash:
cat << EOF > /etc/yum.repos.d/logstash.repo
[logstash-6.x]
name=Elastic repository for 6.x packages
baseurl=https://artifacts.elastic.co/packages/6.x/yum
gpgcheck=1
gpgkey=https://artifacts.elastic.co/GPG-KEY-elasticsearch
enabled=1
autorefresh=1
type=rpm-md
EOF
Cài đặt logstash:
yum install logstash -y
Khởi động và cho phép dịch vụ khởi động cùng hệ thống.
systemctl daemon-reload
systemctl start logstash
systemctl enable logstash
Tạo repo cài đặt Kibana:
cat <<EOF > /etc/yum.repos.d/kibana.repo
[kibana-6.x]
name=Kibana repository for 6.x packages
baseurl=https://artifacts.elastic.co/packages/6.x/yum
gpgcheck=1
gpgkey=https://artifacts.elastic.co/GPG-KEY-elasticsearch
enabled=1
autorefresh=1
type=rpm-md
EOF
Cài đặt Kibana:
yum install kibana -y
sed -i 's/#server.host: "localhost"/server.host: "0.0.0.0"/'g /etc/kibana/kibana.yml
Khởi động và cho phép dịch vụ khởi động cùng hệ thống:
systemctl daemon-reload
systemctl start kibana
systemctl enable kibana
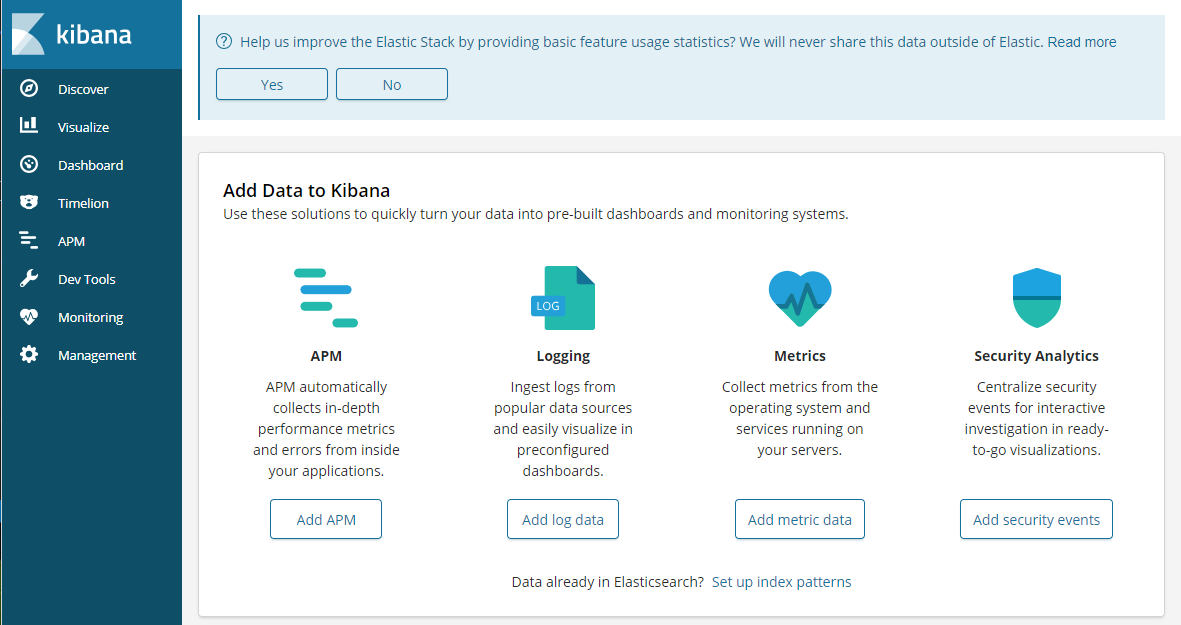
Truy cập vào Kibana kiểm tra:
http://ip-elk_server:5601
Kết quả:
Download phiên bản cài đặt của filebeat:
curl -L -O https://artifacts.elastic.co/downloads/beats/filebeat/filebeat-6.2.4-amd64.deb
Cài đặt filebeat:
dpkg -i filebeat-6.2.4-amd64.deb
Coppy file cấu hình filebeat để backup khi có lỗi trong lúc cấu hình :
cp /etc/filebeat/filebeat.yml /etc/filebeat/filebeat.orig
rm -rf /etc/filebeat/filebeat.yml
touch /etc/filebeat/filebeat.yml
Đẩy các cấu hình sau vào cấu hình của filebeat:
cat > /etc/filebeat/filebeat.yml << EOF
filebeat:
prospectors:
    - paths:
        - /var/log/*.log
    encoding: utf-8
    input_type: log
    fields:
        level: debug
    document_type: type
registry_file: /var/lib/filebeat/registry
output:
logstash:
    hosts: ["10.10.10.190:5044"]
    worker: 2
    bulk_max_size: 2048
logging:
to_syslog: false
to_files: true
files:
    path: /var/log/filebeat
    name: filebeat
    rotateeverybytes: 1048576000 # = 1GB
    keepfiles: 7
selectors: ["*"]
level: info
EOF
Khởi động filebeat:
service filebeat start
Dùng tcpdump để kiểm tra xem log đã được đẩy về ELK server hay chưa:
tcpdump -i 2 | grep 10.10.10.190
Kết quả như sau :
tcpdump: verbose output suppressed, use -v or -vv for full protocol decode
listening on eth0, link-type EN10MB (Ethernet), capture size 262144 bytes
22:42:07.262742 ARP, Request who-has 10.10.10.190 tell gateway, length 46
22:42:07.908019 IP Log-Server.58340 > 10.10.10.190.lxi-evntsvc: Flags [S], seq 1184957997, win 29200, options [mss 1460,sackOK,TS val 606986801 ecr 0,nop,wscale 7], length 0
22:42:07.908213 IP 10.10.10.190.lxi-evntsvc > Log-Server.58340: Flags [S.], seq 3721088840, ack 1184957998, win 28960, options [mss 1460,sackOK,TS val 172980836 ecr 606986801,nop,wscale 7], length 0
22:42:07.908233 IP Log-Server.58340 > 10.10.10.190.lxi-evntsvc: Flags [.], ack 1, win 229, options [nop,nop,TS val 606986801 ecr 172980836], length 0
22:42:07.917125 IP Log-Server.58340 > 10.10.10.190.lxi-evntsvc: Flags [P.], seq 1:8079, ack 1, win 229, options [nop,nop,TS val 606986810 ecr 172980836], length 8078
22:42:07.923344 IP 10.10.10.190.lxi-evntsvc > Log-Server.58340: Flags [.], ack 8079, win 353, options [nop,nop,TS val 172980851 ecr 606986810], length 0
22:42:07.108350 IP 10.10.10.190.lxi-evntsvc > Log-Server.58340: Flags [P.], seq 1:7, ack 8079, win 353, options [nop,nop,TS val 172981036 ecr 606986810], length 6
22:42:07.108374 IP Log-Server.58340 > 10.10.10.190.lxi-evntsvc: Flags [.], ack 7, win 229, options [nop,nop,TS val 606987002 ecr 172981036], length 0
Thêm repo Elastic:
cat > /etc/yum.repos.d/elastic.repo << EOF
[elasticsearch-6.x]
name=Elasticsearch repository for 6.x packages
baseurl=https://artifacts.elastic.co/packages/6.x/yum
gpgcheck=1
gpgkey=https://artifacts.elastic.co/GPG-KEY-elasticsearch
enabled=1
autorefresh=1
type=rpm-md
EOF
Cài đặt filebeat:
yum install filebeat-6.2.4 -y
Coppy file cấu hình để backup:
cp /etc/filebeat/filebeat.yml /etc/filebeat/filebeat.yml.orig
rm -rf /etc/filebeat/filebeat.yml
touch /etc/filebeat/filebeat.yml
Thêm vào filebeat những cấu hình như sau :
cat > /etc/filebeat/filebeat.yml << EOF
filebeat:
prospectors:
    - paths:
        - /var/log/*.log
    encoding: utf-8
    input_type: log
    fields:
        level: debug
    document_type: type
registry_file: /var/lib/filebeat/registry
output:
logstash:
    hosts: ["10.10.10.190:5044"]
    worker: 2
    bulk_max_size: 2048
logging:
to_syslog: false
to_files: true
files:
    path: /var/log/filebeat
    name: filebeat
    rotateeverybytes: 1048576000 # = 1GB
    keepfiles: 7
selectors: ["*"]
level: info
EOF
Khởi động filebeat:
systemctl start filebeat
systemctl enable filebeat
Dùng tcpdump để kiểm tra.
tcpdump -i 2 | grep 10.10.10.190
Trong bài này mình đã tổng quan lại cách cài đặt ELK stack và cách cài đặt filebeat để đẩy log từ các OS Ubuntu và CentOS về ELK.
Trong bài sau mình sẽ viết về các thao tác cơ bản với Dashboard của Kibana như cách tạo Index để nhận log trên Dashboard, cách setup biểu đồ, cách tìm kiếm hiệu quả cũng như một số lưu ý trong quá trình sử dụng ELK.
Thực hiện bởi cloud365.vn
Chuỗi bài giới thiệu về giải pháp ELK
Tìm hiểu về logstash.
Tìm hiểu về filebeat.
Cài đặt ELK sử dụng kafka làm cache
Tài liệu về ELK stack
Tài liệu về ELK stack
Tài liệu về ELK stack